Pages

Wednesday, December 29, 2010

everybody has a first: the binding

using Elizabeth from Oh, Frannsson!'s tutorial, i made and attached my own binding to finish my first quilt. i decided on a grey cotton with little white dots and circles to add a complimentary pattern to the modern quilt top. i didn't use the cotton boll fabric that i'd originally planned on since i thought it was a little too country for the contemporary-ness of the finished product.

here goes!


sewing the strips together.


after ironing the long band of fabric in half.


pinning it onto the quilt, and sewing.


after machine-attaching one side, i rolled the quilt up, stuck it in my suitcase, and hand finished the other side at my parent's house in texas.

pictures of the completed quilt coming soon.

p.s. i hope you all had a wonderful holiday!

Thursday, December 16, 2010

everybody has a first: part two

i've made lots of progress on my first quilt over the past couple of weeks.
i sewed all the quilt top strips together to form one big cohesive piece.


then the ironing began. it took quite a bit longer than i imagined it would.


i made the quilt back out of muslin and two big scraps of fabric i had left over from my work on the top. i placed them in an opposite direction from the strips on the front of the quilt to keep it interesting.
then... quilt sandwich time!


after the sandwich was pinned, i began quilting. in all my quilt-making research, i've read lots about people who wear gloves, and how to move the fabric through the machine, dropping the feed dogs, freehand patterns, etc. i decided for my first try, i'd keep it simple. i opted to stitch in the ditch-or maybe around the ditch would be a more accurate description. i kept my feed dogs in action, and was surprised at how much effort it actually took to pull the quilt through the machine. what a work out!


taa-daaaah


trimming.


and here's the final product without binding.


i'm so happy with how it's turned out. i am going to give it to my mom for christmas, and HAVE to finish it tomorrow night as i leave town for her place on friday. wish me luck, and i'll post the completed version very soon.

Monday, December 13, 2010

placemats

i've been thinking about what to make my boyfriend's mom for christmas, and upon seeing alissa's placemats on one of my favorite blogs, handmade by alissa, i knew they'd be the golden ticket. since there were a few days between her posting of the images of the finished products, and her posting of the actual pattern, i tried my hand at improvising. let me tell you... it was a disaster.

it is going to take some time for me to wrap my brain around cutting and piecing and cutting through that to add more material, and cutting it in a different direction to watch it grow by another stripe. when i tried it myself, it didn't dawn on me to work this way. instead, i measured the size of each block or strip, cut them out, and put them together like a puzzle. know what i mean? i didn't realize till the end that i'd totally forgotten about seam allowances!


anyway, i gave up on my version, and once alissa posted the pattern, i went for it!


i used a nice brown linen for the main fabric, and kept it simple with muslin and a camel cotton. i decided neutral was the way to go.


this was really my first time quilting! not perfect, but i like the handmade-ness of the semi-crooked lines.


trimming the finished product.


i found these little personalized tags at the fabric store, although i'd like to design my own tag at some point, it worked in a pinch.


somehow i ended up with 4 right-striped placemats, and 2 left-sided mirror images. i'll bet it has something to do with a manufacturer malfunction, i'm just not quite sure how i managed that!


i haven't jumped into making the binding yet, but i'm thinking about using the bright flower burst material to add some color and contrast. i also don't want the placemats to end up looking too 70's brown. what do you think?


i'm putting the binding off at the moment because i'm trying to finish up the quilt i started a week or so ago. it has to be ready to go on thursday, and i'm about to start quilting it now. more pictures soon.

Friday, December 10, 2010

to wash or not to wash?

most of the quilting tutorials i read tell me to pre-wash my fabrics. i've also seen a few that don't. those are the ones i listen to.

the bottom line for me is this: it is a logistical nightmare to wash my own dirty laundry, much less the 10 yards of new fabric i've accumulated.

i live in a small NYC apartment and don't have a washing machine. here's my once-every-few-weeks routine: hauling a usually 30 lb. bag of to-be-cleaned up and down four, that's right, four flights of stairs, carrying it santa-style a block and a half to the washateria, in the freezing cold, fighting for machines, spending what always seems like an eternity in laundry-limbo, folding, and repeat.

so, my question to you is: how necessary is it to pre-wash quilting pieces? are certain fabrics more susceptible to shrinkage and bleeding than others? what are your experiences with washing/not washing?

any advice on this matter would be much appreciated. i'm just trying to help myself avoid having to learn the hard way, which is my usual method of transportation.

Tuesday, December 7, 2010

digital clock building - 200 water street

this is my favorite building facade in nyc. it's at 200 water street, and apparently it is a clock, but i've never seen it tell the correct time. i was absolutely shocked the first time i saw it looming discreetly as i walked to the south street seaport, its numbers flickering and immediately drawing me in. it makes me infinitely happy that little - er - big treasures like this exist in the world.

here's my snapshot:


here's an evening photo i found on the nyclovesnyc blog:


along with the image, this information about the building is noted:

The 45-by-50-foot digital clock was created by artist Rudolph de Harak. While the numbers may appear to adorn the exterior of 135 John Street, the display clock actually belongs to the adjacent 200 Water Street, a 32-story building designed by the architecture firm of Emory Roth & Sons and completed in 1971. The device consists of 72 square sections, each containing a number from 00 to 59. Once lit to display the accurate time hour, minute, and second, the clock has lost time over the years but remains a Lower Manhattan landmark. 

i also read somewhere that it was the largest digital clock in the world for quite some time. the history of the entire development, which is interesting, to say the least, can be read here. let me just mention, the original design included an entrance through a large, corrugated steel neon-lit tunnel. very futuristic.


what are your favorite landmarks in your city?

Sunday, December 5, 2010

runaway iron

i'm getting ready to iron the seams of my quilt pieces and the iron is nowhere to be found. is it even possible to loose an iron?? apparently so. my apartment isn't that big and there are precious few hiding places. if it's not in its usual spot, and it's not in one of the four other fathomable locations, then where is it?

i'm suddenly feeling attached to it, now that it's missing. i got that iron in 1999 when i went off to college! maybe it's time for a new one.

this is weird.
and i'm off to cvs.

**update: there was not an iron to be found within a 6 block radius around my apartment. i even tried the giant dollar store (that i secretly sort-of love) that carries everything from christmas trees and hair products to curtains, cleaners, pots and pans and every toy ever manufactured. they even had sewing machines! i went there as a last resort, knowing they'd have irons too, and kicking myself for wasting my time walking around in the freezing cold night, but i was out of luck.

plan b is to make my first trip to k-mart in harold square after work today. i hear it's a bit of a nightmare, but i guess you do what you have to do to get your hands on an iron.

i still can't believe my old trusty went missing. (???)

everybody has a first

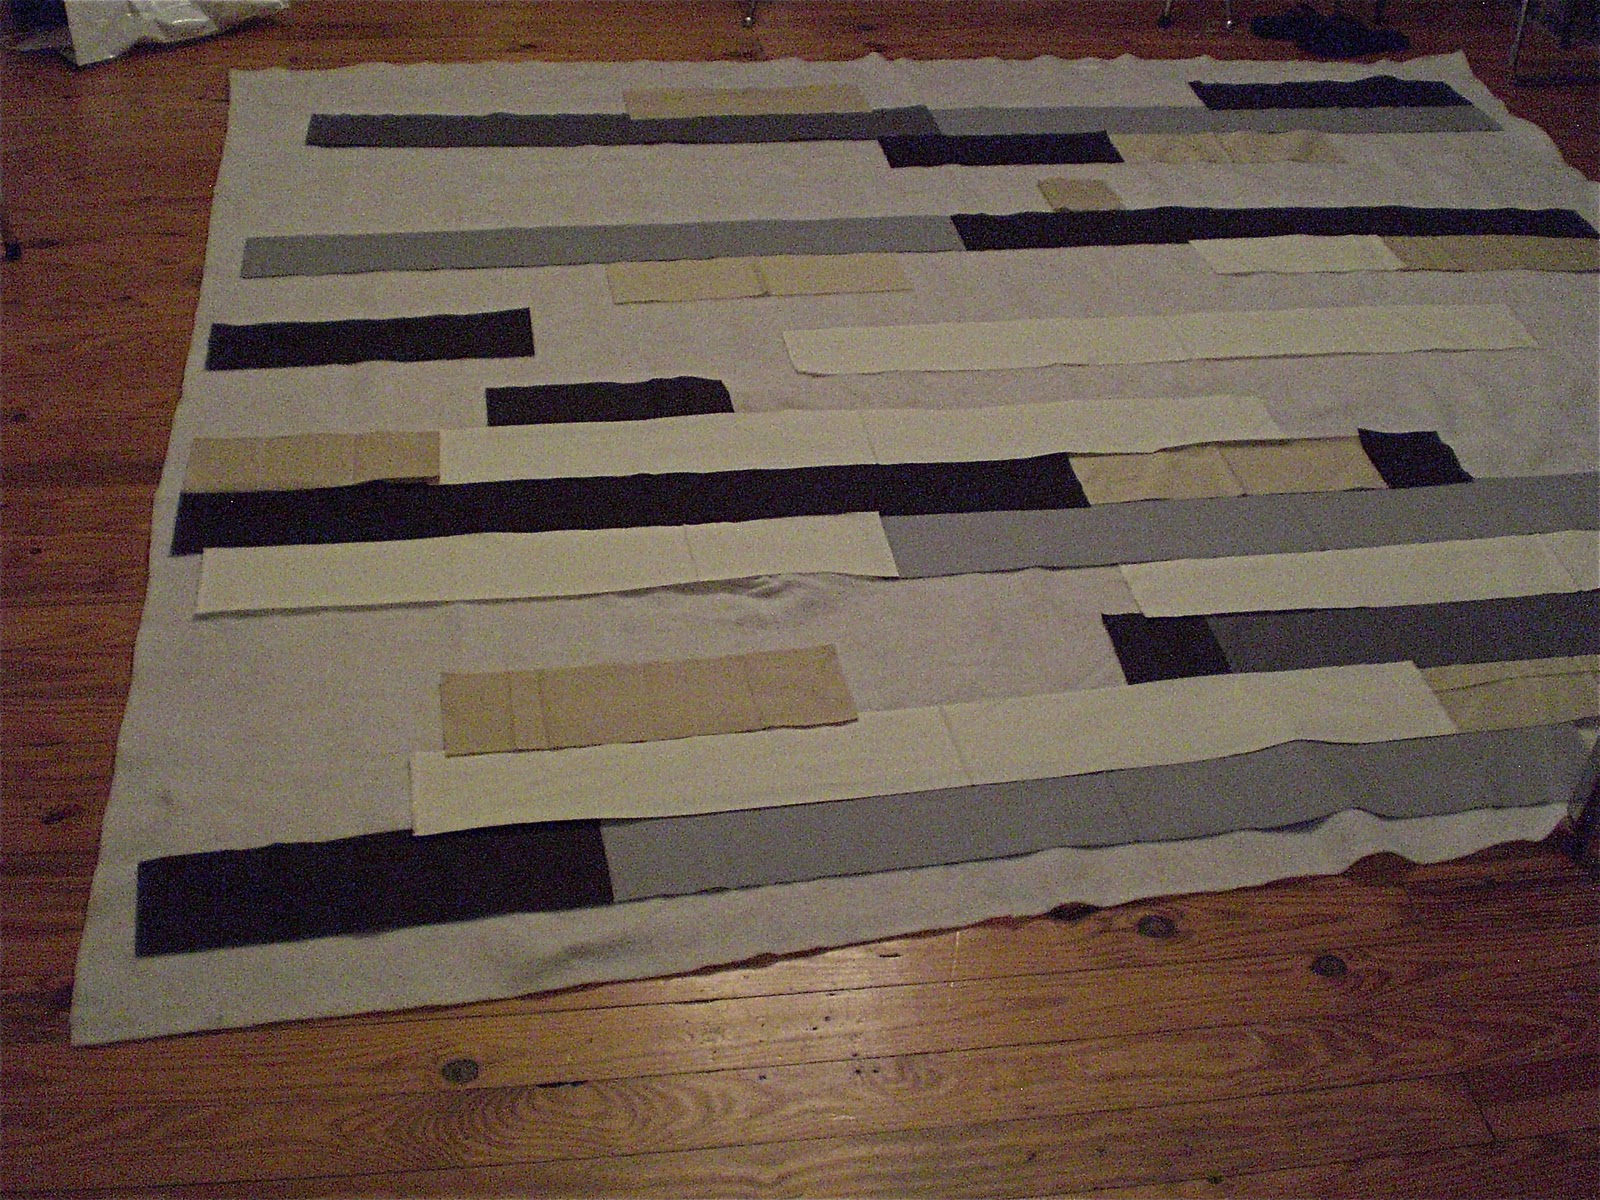
i've leapt head-first into making my inaugural quilt. i didn't want to spend countless hours measuring tiny squares, arranging and sewing them together, so i opted for a simpler approach. i cut the neutral, solid material into long strips - just the width of my quilting ruler - and used them like puzzle pieces, placing them on top of the batting on the floor of my (newly re-arranged) apartment. i used the batting as a measuring tool for the size of the quilt as it was easier for me to visualize the dimensions of the thing by actually looking at it, rather than imagining exactly how big 90 inches was going to be.

initially, i was going to make a smaller quilt, saving half of the batting for another project.


then, i unrolled it just to see how much bigger it would actually be, and i couldn't resist just going for it.


here's a shot of my make-shift cutting table and you can see the quilt top coming together on the floor in the background.


once the strips were satisfactorily in place, i pinned them end-to-end to make it easy for me to see who went with who once the sewing began.


the quilt top is now waiting to be ironed and i'll soon begin sewing the long strips together to create a cohesive block. hopefully, by the end of the day i'll be able to start quilting!